Monterey endpoint protection checkliststarts with a hard truth: most SMBs trust the wrong list. A quick Google search shows nine how‑to videos that skip the real security controls. You end up with a half‑done setup that still leaves data at risk.
In this guide you’ll get a full, actionable checklist that covers every layer you need , from core protection to ongoing monitoring. Follow each step and you’ll move from a shaky default to a hardened, compliant endpoint fleet.
Step 1: Assess Your Current Endpoint Security Posture
First, know what you have. List every Mac in the office, every laptop that works from home, and every device that talks to the network. Capture model, OS version, and who uses it. This inventory is the base for every later decision.
Next, run a quick health scan. Look for outdated OS builds, missing patches, or disabled security features. Tools that pull data from Apple’s built‑in reporting can give you a CSV you can sort.
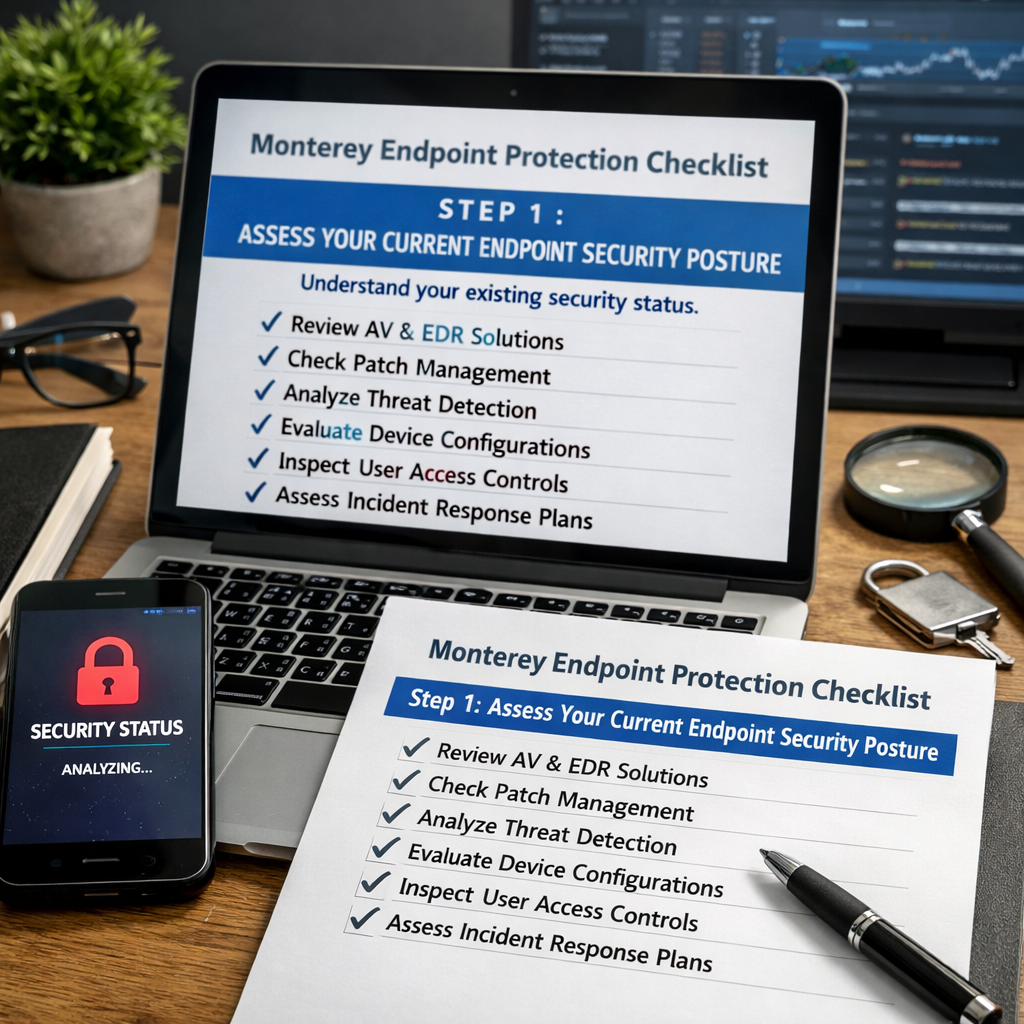
When you compare the scan results to the inventory, you’ll spot gaps. Maybe half the machines still run macOS 11 while Monterey is the standard. Those machines need an upgrade plan.
Ask yourself three questions: Are all devices enrolled in a mobile‑device‑management (MDM) system? Do they have FileVault turned on? Are they reporting to a central log server? If you answer no to any, you have work to do.
Now compare your findings to industry standards. The NIST Cybersecurity Framework lists “Identify” as the first function , exactly what you’re doing here. Align your inventory to the “Asset Management” sub‑category and you’ll meet a recognized best practice.
Finally, document everything in a shared drive that the whole IT team can see. When a new hire gets a Mac, the checklist tells you exactly what to do.
Bottom line:Know every Mac you own before you try to protect it.
Step 2: Implement Core Protection Layers
Now that you have a list, add the basic shields. Think of them as layers on a cake , each one helps stop a different kind of bite.
Start with antivirus and anti‑malware. Choose a solution that supports macOS Monterey natively, offers real‑time scanning, and updates automatically. SentinelOne, for example, reports that 68% of organizations saw a targeted endpoint attack in the past year, showing why real‑time protection matters.
Each layer works on its own, but together they give you a strong defense. If a virus slips past the AV, the firewall may block its network call. If the firewall is bypassed, DLP can stop the data from leaving.
Don’t forget to set policies. A common mistake is to install the software and then ignore the policy settings. Turn on auto‑protect, schedule daily scans, and enable quarantine actions.
For SMBs, managing these layers yourself can be a drain. That’s where cybersecurity services shine , they handle updates, policy tuning, and alert triage so you can focus on work.
Bottom line:Deploy antivirus, firewall, IPS, DLP, and encryption together for a solid base.
Step 3: Configure Monterey‑Specific Security Settings
Monterey adds a few new controls you should turn on right away. First, enable Gatekeeper strict mode. It blocks apps that aren’t from the App Store or not signed by a known developer.
Second, turn on System Integrity Protection (SIP). SIP stops malicious code from modifying core system files.
Third, enable FileVault full‑disk encryption if you haven’t already. It uses XTS‑AES‑128 encryption, which meets most compliance rules.
Fourth, set up the built‑in firewall to block incoming connections by default. Then add explicit allow rules for services you need, like SMB for file shares.
After you enable those settings, test them. Use a second Mac to try launching an unsigned app , it should be blocked. Try a network scan to see the firewall in action.
Remember the CISA guidance on macOS hardening , it recommends these exact steps for federal agencies, and they work just as well for SMBs.
Bottom line:Enable Gatekeeper, SIP, FileVault, and the firewall to lock down the OS itself.
Step 4: Deploy and Manage Endpoint Protection Software
With the layers chosen, you now need a smooth rollout. Use an MDM or a JSS to push the installer to every Mac. That way you avoid manual clicks on each machine.
Before you push, test in a lab. Take a spare Mac, install the software, and break a few things on purpose , like disabling the firewall. See how the tool reacts. Record the steps you took to fix it.
When the test passes, create a rollout schedule. Start with a pilot group of ten users, watch the logs for any false positives, then expand to the whole fleet.
During the rollout, keep an eye on version compatibility. macOS updates can break older agents. If you see a “System Extension Blocked” warning, follow the vendor’s guide to re‑authorize the extension.
After deployment, set up a regular health check. Every week run a script that reports AV version, definition age, and last scan date back to a central dashboard.
backup and disaster recovery plans should also include endpoint snapshots so you can roll back a machine if the protection software ever corrupts a file.
Bottom line:Use a lab, a pilot, and ongoing health checks to keep the software running well.
Step 5: Establish Monitoring and Response Procedures
Even the best tools need eyes on them. Set up a SIEM or a managed detection service that pulls logs from the AV, firewall, and macOS Unified Logging system.
Define alerts for three signs: a sudden spike in file writes, a quarantine event on a critical folder, or a failed login from an unusual location. When an alert fires, the first step is to isolate the device , disconnect it from Wi‑Fi or put it in a VLAN with no internet.
Next, run the vendor’s removal script. Most Mac AV vendors ship a command‑line tool that cleans known malware. Follow it, then patch the OS.
Finally, restore from the latest clean backup. Test the restore at least once a quarter so you know it works.
The NIST Cybersecurity Framework spells out the “Respond” function , detect, contain, eradicate, recover. Align your playbook to those steps and you’ll meet many compliance audits.
Bottom line:Monitor alerts, isolate fast, clean, then restore.
Frequently Asked Questions
What is the first thing I should do when building a Monterey endpoint protection checklist?
Start with a full inventory of every macOS device, note the OS version, and check if each one is enrolled in MDM and has FileVault on. That gives you a solid base to apply the rest of the checklist.
How often should I update my endpoint protection software on Monterey devices?
Update at least once a week. Most vendors release new definitions daily, but a weekly schedule ensures you get the latest protections without overloading the network.
Do I need a separate firewall if macOS already has a built‑in one?
Yes. The built‑in firewall blocks inbound traffic, but a network firewall adds perimeter protection, stops malicious traffic before it reaches the Mac, and can enforce VLAN segregation.
What role does MDM play in endpoint protection?
MDM pushes security settings, installs updates, and can lock down devices remotely. It also reports compliance status so you can see which machines are missing a control.
How can I test my backup and disaster recovery plan?
Pick a random Mac, delete a test file, then restore it from the backup. Verify the file’s integrity and that the restore finishes in under an hour. Run this test quarterly.
What compliance frameworks matter for Monterey endpoint protection?
HIPAA for health firms, PCI‑DSS for payment processing, and the NIST Cybersecurity Framework for general security. Align your controls to the relevant sections of each framework.
Ready to make your technology work for your business? Contact us for a free security assessment and see how we can help you lock down every Mac.