Ever wonder why a routine check‑up feels more like a lifesaver than a chore?
If you run a small or mid‑size business in Salinas, you already juggle payroll, customers, and maybe a handful of IT hiccups. One missed software patch or an undiscovered open port can turn that juggling act into a nightmare, especially when compliance deadlines loom.
That’s where vulnerability scanning services step in – they’re like a digital doctor that runs through every system, spot‑checking for weak spots before a hacker gets a chance to exploit them.
The beauty of a good scan is its predictability: you get a clear report, a risk rating, and actionable remediation steps, all without pulling the plug on your daily operations.
Imagine a local dental practice that thought its patient data was safe because they updated Windows last month. A quarterly scan later revealed an outdated plugin on their booking portal that could have exposed thousands of records. Fixing it took just a few hours, but the peace of mind saved weeks of potential downtime and audit headaches.
For SMB owners, the ROI is crystal clear – fewer breaches, lower insurance premiums, and smoother compliance audits. And when you pair scans with a managed security partner, you get ongoing monitoring, patch management, and expert advice without adding a full‑time security team.
Curious how the terminology lines up? Our IT Threat Glossary breaks down common vulnerabilities, from SQL injection to misconfigured cloud storage, so you can speak the same language as your tech team.
Ready to turn unknown gaps into actionable fixes? Let’s start by scheduling a baseline scan, reviewing the report, and building a remediation roadmap that aligns with your business priorities.
When you partner with a local expert who understands the Monterey market, you get faster response times, tailored recommendations, and a trusted ally who watches the horizon for emerging threats.
Quick Guide to SMB Vulnerability Scanning for Compliance & Security
Vulnerability scanning services give Salinas SMBs a quick, low‑cost health check that spots hidden gaps before hackers exploit them. By scheduling a baseline scan, reviewing the findings, and fixing the top‑priority issues, you protect patient data, meet compliance, and keep your business running smoothly with confidence and peace of mind.
Step 1: Identify Your Critical Assets and Exposure Points
Let’s be honest—if you don’t know exactly what you have to protect, you’re basically leaving the front door wide open. That feeling of “maybe something’s out there, but I’m not sure” is what keeps many Salinas SMB owners up at night.
First, think about the things that would truly cripple your business if they went dark. For a dental office, it’s patient records and the online scheduling portal. For an e‑commerce boutique, it’s the product catalog, payment gateway, and customer email list. Those are your critical assets.
Now, grab a piece of paper—or open a spreadsheet—and start inventorying every device, application, and service that touches those assets. Include laptops, point‑of‑sale terminals, on‑prem servers, cloud instances, even the Wi‑Fi router in the break room. The goal is a complete picture, not just the shiny new gear.
Once you have that list, rank each item by the impact its loss would have. Use a simple three‑tier system: High (business‑critical), Medium (important but not fatal), Low (nice‑to‑have). This risk‑based classification will drive how often you scan each asset.
For a deeper dive into protecting those assets, check out our Network Security Essentials guide, which walks you through the basics of segmenting and hardening your environment.
Next, map out exposure points. These are the doors hackers love to try: open ports, outdated plugins, misconfigured cloud buckets, and even default admin passwords. A quick way to spot them is to run a basic network discovery scan—think of it as a “lights‑on” check that shows every IP address talking on your network.
Real‑world example: A local dental practice thought their Windows updates were enough. After we ran an asset inventory, we discovered an older version of a third‑party imaging plugin still exposing a known CVE. The scan flagged it, they patched it in a couple of hours, and avoided a potential HIPAA breach.
Another scenario: A small e‑commerce shop in Monterey was selling handcrafted goods online. Their inventory system lived in the cloud, but a stray S3 bucket was left publicly readable. By identifying that exposure point early, they prevented millions of product photos and customer emails from being indexed by search engines.
Watch this short video for a visual walk‑through of how an asset inventory feeds straight into a vulnerability scan:
After the scan finishes, you’ll get a report that highlights each finding next to the asset you just cataloged. Prioritize the high‑risk items—those that sit on critical assets and have a known exploit. Then assign an owner (usually the system admin or the department head) to drive remediation.
Here’s a quick checklist you can copy straight into your next planning session:
- Create a master inventory of hardware, software, and cloud services.
- Classify each item by business impact (High/Medium/Low).
- Identify exposure points: open ports, outdated software, misconfigured storage.
- Map each asset to its exposure points in a simple table.
- Assign an owner for remediation and set a deadline based on severity.
- Schedule recurring scans—at least weekly for high‑risk assets, monthly for the rest.
Remember, the whole point of this exercise is to turn “unknown unknowns” into “known items we can fix.” When you know exactly what you’re protecting, the rest of the vulnerability management process becomes a lot less scary.
Ready to take the first step? Start your inventory today, and you’ll soon see how vulnerability scanning services can give you that peace of mind you’ve been missing.
Step 2: Choose the Right Vulnerability Scanning Service for Your Business
Now that you’ve finally mapped every laptop, cloud app, and point‑of‑sale terminal, the real decision begins: which vulnerability scanning service actually understands the way you work day‑to‑day?
Does the idea of a one‑size‑fits‑all scanner make you cringe? Good. Because the right tool should feel like a custom‑fit glove, not a clunky mitt.
1. Know Your business profile
Start by answering three quick questions: How many users does your team have? Are you storing regulated data like patient records or credit‑card numbers? And how much IT staff time can you realistically spare for scan reviews?
For a small dental office in Salinas, the answer might be “under 20 users, HIPAA‑covered data, and only one part‑time admin.” A regional e‑commerce shop could be the opposite: 150 users, PCI‑compliant payment gateways, and a full‑time IT manager. Your answers dictate whether you need a lightweight, automated SaaS scanner or a managed service that includes a human analyst to translate the findings.
2. Match scanning types to your needs
Vulnerability scanners come in three main flavors: network‑only, web‑application, and agent‑based host scanners. Network‑only tools sweep open ports and mis‑configurations—perfect for a boutique that runs most services on a single firewall. Web‑application scanners dig into code, looking for SQL injection or cross‑site scripting—essential for a site that processes online orders. Agent‑based scanners sit on each endpoint, catching missing patches on laptops that roam between the office and a client’s house.
If you’re not sure which mix you need, take a look at our Understanding Penetration Testing Services for SMBs: A Practical Guide. Even though it focuses on pen testing, the guide breaks down the same asset categories that inform a good scanning strategy.
3. Vet the vendor’s credentials
Ask for proof of certifications—CISSP, CISA, or at least a SOC 2 Type II audit. A vendor that can show you a recent audit report demonstrates that they handle data responsibly and that their own processes are regularly tested.
Look for real‑world references in the same industry. A local health‑care provider that switched to a new scanner should be able to tell you how quickly critical CVEs were flagged and patched. If the vendor can’t name a single SMB client in Monterey, that’s a red flag.
4. Consider pricing and scalability
Most SMB‑focused services charge per IP address or per device, with discounts as you add more assets. Make sure the pricing model aligns with your growth plans. A flat‑rate model might look cheap now, but if you add a new cloud server every quarter, a per‑asset plan could become cheaper in the long run.
Don’t forget hidden costs: report customization, API access for ticketing integration, or on‑boarding fees. Write these down and compare them side‑by‑side in a simple spreadsheet.
5. Test before you commit
Ask for a trial scan of a non‑critical segment—maybe your guest Wi‑Fi network. During the trial, watch how fast the scan finishes, how the results are presented, and whether the vendor’s support team can explain the risk scores in plain language.
Take note of the false‑positive rate. A service that flags everything as “high risk” will drown you in noise, while one that misses obvious gaps defeats the purpose.
6. Put it all together
Grab a piece of paper (or a new sheet in your asset spreadsheet) and fill in these columns: Service name, Scan type, Certified staff?, Pricing model, Trial results, Industry references.
Score each row on a 1‑5 scale for fit, then total the scores. The highest‑scoring vendor is the one that best matches your risk tolerance, budget, and staffing reality.
Remember, the goal isn’t just to buy a tool; it’s to add a reliable “early warning system” to the workflow you already built in Step 1. When the right vulnerability scanning service is in place, you’ll finally sleep easier knowing you’ve turned those “unknown unknowns” into manageable tasks.
Step 3: Implement and Schedule Automated Scans
Alright, you’ve picked a scanner and you’ve mapped every laptop, server and cloud app in Step 1 and 2. Now comes the part that turns a one‑off test into a reliable early‑warning system: actually running the scans on a schedule.
First thing to do is create a scan task that knows exactly what to look at. In most SaaS or appliance‑based vulnerability scanning services you’ll find a “New Task” button in the dashboard. Give the task a clear name – something like “Quarterly Dental‑Office Core Scan” – and point it at the target list you built earlier (IP ranges, hostnames, or asset tags).
When you define the task, you’ll be asked to choose a scan profile. For SMBs that can’t afford downtime, the “Full and fast” profile is a good sweet spot: it checks the most common CVEs, open ports and misconfigurations without hammering production servers. If you have a handful of high‑risk assets – say, your patient‑records database – you can layer a deeper “Full and very deep” scan on a weekly basis just for that host.
Now, schedule it. Most services let you pick a recurrence: daily, weekly, monthly, or even custom cron‑style intervals. A practical rule of thumb for small to mid‑size businesses is:
- Critical assets (HIPAA, PCI) – weekly scan.
- All other servers – monthly scan.
- Public‑facing web apps – weekly after any code change.
- Guest Wi‑Fi router – monthly scan.
Why the staggered cadence? A weekly scan of your most sensitive systems catches a newly disclosed vulnerability within days, giving you time to patch before an auditor walks through your doors. The monthly scans keep the broader footprint tidy without overloading your bandwidth.
Don’t forget to set a maintenance window. If you run the scan at 2 am local time on a Saturday, you’re less likely to interrupt point‑of‑sale terminals or a busy clinic schedule. Most scanners let you define a start time and also a maximum duration – say, two hours – after which the scan will pause and resume later.
While the scanner is chugging through ports, you’ll want alerts wired up so you’re not staring at a report that lands in a folder you never open. Configure an email notification for any finding with a CVSS score of 7.0 or higher. If your ticketing system supports it, map those alerts to a PSA ticket automatically; that way the IT manager gets a fresh ticket the moment a critical flaw appears.
A quick real‑world example: a local law firm in Salinas set up an automated weekly scan of their document‑management server. One Saturday the scan flagged a missing Windows patch that addressed a ransomware exploit. Because the alert was set to email the office manager and create a ticket, the patch was applied within four hours – well before the firm’s next client deadline.
Another story from a boutique e‑commerce shop: they only ran a quarterly scan at first and missed a newly published vulnerability in their payment gateway plugin. After switching to a bi‑weekly schedule for the web‑app component, the scanner caught the issue in time for a quick vendor update, saving the shop from a potential breach and an expensive PCI audit penalty.
If you’re worried about scan impact on production, most tools offer a “safe checks” mode that disables the few VTs known to cause service disruptions. You can also limit the number of concurrent hosts or ports per scan – a setting often called “maxhosts” or “maxchecks”. Tuning those values down to, say, five simultaneous hosts, reduces CPU load on the scanning appliance and on the targets.
Finally, make the schedule a living document. After each scan, review the report, close out any tickets, and note if you needed to rerun a scan because a false positive slipped through. Adjust the frequency or profile as your environment changes – a new cloud instance, a migrated email server, or a seasonal surge in point‑of‑sale devices.
Bottom line: automation is only as good as the rules you set. By naming tasks clearly, picking the right scan profile, staggering frequencies based on risk, and wiring up real‑time alerts, you turn vulnerability scanning services from a once‑a‑year chore into a continuous shield that lets you sleep easier.
Step 4: Interpret Scan Results and Plan Remediation
Alright, the scanner has finished and you’ve got a big PDF or CSV staring back at you. That moment can feel like opening a mystery box – you’re excited, a little nervous, and you’re not sure where to start.
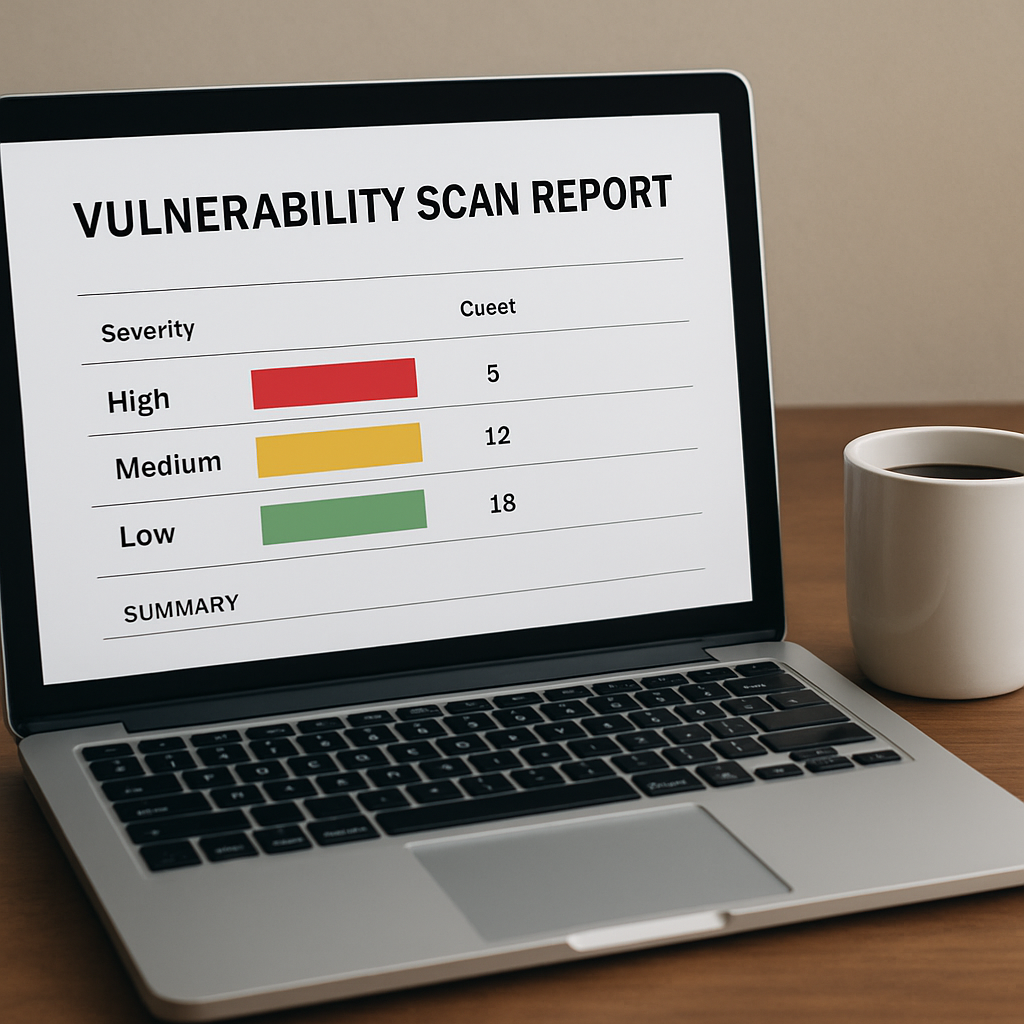
First thing we do is skim the executive summary. It usually tells you how many findings fell into each severity bucket (Critical, High, Medium, Low). If you see a handful of Criticals, that’s your cue to drop everything and investigate.
Read the report, don’t just stare at numbers
Most vulnerability scanning services break each finding into three parts: the CVE identifier, the affected asset, and a brief description. Open the detailed view for each Critical or High entry and ask yourself:
- Which asset does this affect? Is it a patient‑records server, a point‑of‑sale terminal, or a public web app?
- What’s the CVSS score and does CISA list it as a Known Exploited Vulnerability (KEV)?
- Is there an easy‑fix patch already available?
If the scan references a KEV, you’ve got a time‑sensitive risk – the federal guidance in CISA’s remediation directive says you should aim to patch within 30 days.
But numbers alone don’t tell the whole story. That’s where your business context jumps in.
Prioritize with severity + business impact
Take the raw CVSS score and layer it with the asset’s value to your business. A “Critical” finding on a low‑risk guest Wi‑Fi router isn’t as urgent as a “High” finding on a HIPAA‑covered patient database.
Grab a simple three‑column table and fill in:
- Asset (e.g., Dental‑Office EMR server)
- Finding (CVE‑2023‑XXXXX, CVSS 8.7)
- Business impact (High – could expose PHI)
Rank the rows: Critical + High impact = immediate action; High + Medium impact = next‑day ticket; Medium/Low = schedule into the next patch window.
And remember: not every high‑scoring CVE is exploitable in your environment. If the vulnerable service is disabled or behind a firewall, you may downgrade the urgency – just document why.
Build a remediation plan that your team can actually follow
Now turn those ranked items into bite‑size tasks. A good remediation ticket includes:
- Clear title: “Patch OpenSSL on EMR server (CVE‑2023‑XXXXX)”
- Owner: the sysadmin who manages that server
- Deadline: based on the priority you set earlier
- Steps: download patch from vendor, test in staging, deploy during maintenance window
- Verification: run a targeted scan after patch, confirm the finding disappears
If you’re juggling several assets, a lightweight spreadsheet or a ticketing system works fine. The key is to assign responsibility – nothing gets fixed if it’s “unassigned.”
For SMBs that lack a dedicated patch manager, we often recommend a “patch‑first‑on‑critical” policy: any patch that resolves a Critical or a Known Exploited Vulnerability gets priority over routine updates.
Track, verify, and close the loop
After you apply a fix, rerun a focused scan on that host. The finding should disappear; if it doesn’t, you either missed a step or the patch didn’t apply correctly.
Document the outcome in the ticket: “Remediated – verified by follow‑up scan on 2026‑01‑07.” This creates an audit trail that satisfies compliance auditors and gives you peace of mind.
Finally, schedule a brief post‑remediation review each month. Look for patterns – maybe a particular software vendor’s updates are always late, or a specific server type generates the most findings. Those insights help you fine‑tune future scans and even inform budgeting for newer, more secure technology.
One practical tip many Salinas businesses swear by is to map each remediation deadline to a calendar reminder that syncs with their primary ticketing tool. That way, when the due date rolls around, the system nudges the owner automatically, and nothing slips through the cracks. Pairing this with a quarterly “remediation health check” – a quick run of the scanner on previously fixed assets – lets you confirm that old patches haven’t regressed and keeps your compliance score looking healthy.
Bottom line: interpreting the raw data is only half the battle. By layering severity with business impact, assigning clear owners, and verifying fixes with a follow‑up scan, you turn a daunting list of CVEs into a manageable, compliant remediation roadmap.
Step 5: Ongoing Management, Compliance, and Service Comparison
Now that you’ve got a remediation roadmap, the real question is: how do you keep the momentum going without letting things slip back into the dark?
Think about it like a car’s regular oil change. You wouldn’t wait until the engine sputters to remember the maintenance schedule, right? The same principle applies to vulnerability scanning services – you need a repeatable, low‑effort process that lives alongside your day‑to‑day operations.
Set up a continuous scan cadence
Start by classifying your assets into three risk buckets: Critical (HIPAA, PCI, patient data), High (internal servers, finance apps), and Low (guest Wi‑Fi, marketing laptops). For Critical assets run a weekly scan, for High assets a monthly scan, and for Low assets a quarterly scan. Most scanners let you save these profiles, so you only have to create them once.
Tip: schedule the scans during off‑hours – 2 am on a Saturday works for most SMBs because it avoids POS terminals and clinic appointments. If you’re using a managed service, ask them to lock the scan window in their automation engine.
Automate alerts and ticket creation
When a scan finishes, you want the findings to pop straight into the tool your team already uses – whether that’s Jira, ConnectWise, or even a simple email folder. Map any CVSS ≥ 7.0 or any “Known Exploited Vulnerability” (CISA KEV) to a high‑priority ticket. That way the responsible owner gets a nudge before the next business day.
In our experience with a local law firm, the automated ticket landed in the manager’s inbox within minutes of the scan, and the patch was applied in under four hours, keeping the firm audit‑ready.
Keep compliance on a calendar
Compliance isn’t a one‑time checkbox; it’s a recurring rhythm. Pull the scan dates into a shared calendar (Google or Outlook) and color‑code them: red for Critical, orange for High, green for Low. Add reminders two days before the due date to verify that tickets are closed and that a follow‑up “health‑check” scan has run on the same host.
Picture this: a Monterey e‑commerce shop was hit with a PCI audit warning because a patch on their payment gateway was missed. After they added the calendar reminder and the automated health‑check, they haven’t missed a deadline in twelve months.
Compare service options
Not every vulnerability scanning provider offers the same level of ongoing management. Below is a quick comparison of three common service models you’ll encounter in the Salinas market.
| Feature | Self‑Managed SaaS | Managed Service Provider (MSP) | Hybrid Concierge |
|---|---|---|---|
| Scan scheduling | DIY via web UI, manual calendar entry | Vendor sets and adjusts schedule for you | Initial setup by vendor, you control tweaks |
| Alert integration | Email only or API you build | Native ticketing integration (Jira, ConnectWise) | Custom webhook plus optional ticketing |
| Compliance reporting | Raw CSV/PDF, you format | Pre‑built audit‑ready reports each month | Monthly report plus quarterly deep‑dive |
When you weigh these options, ask yourself: Do I have the time to maintain the schedule and parse CSVs, or would I rather pay a bit more for a vendor that handles the heavy lifting?
Also consider licensing overhead. Some platforms charge per endpoint, which can balloon as you add cloud instances. Others offer flat‑rate bundles that include unlimited scans – a better fit if you’re scaling fast.
Practical checklist for ongoing management
- Assign a single “scan owner” – usually the IT manager or a senior admin.
- Document scan frequency per risk tier and lock it in your IT SOP.
- Configure high‑severity alerts to auto‑create tickets in your PSA tool.
- Sync scan dates to a shared calendar with reminder alerts.
- Run a targeted post‑remediation scan within 24‑48 hours of each fix.
- Schedule a quarterly compliance health‑check report – compare findings to the previous quarter to spot trends.
Bottom line: Ongoing management is less about buying a fancier scanner and more about building a repeatable process that meshes with your existing workflows. If you automate alerts, lock schedules into a calendar, and pick a service model that matches your staffing reality, you’ll stay compliant, keep your risk low, and avoid the dreaded “I forgot to patch” nightmare.
Want a deeper dive into licensing considerations that can affect scan frequency and cost? Check out Cisco’s licensing guidance for a clear view of how endpoint counts drive subscription tiers.
FAQ
What exactly are vulnerability scanning services and how do they differ from penetration testing?
Vulnerability scanning services are automated tools that crawl your network, web apps, and endpoints to spot known weaknesses—think outdated patches, mis‑configured ports, or exposed services. They compare what they find against a constantly updated CVE database and assign a risk score. Penetration testing, on the other hand, is a manual, adversary‑style exercise where a security expert tries to exploit those weaknesses to see how deep they go. Scans give you a broad, regular health check; pen tests provide a focused, in‑depth validation.
How often should a small business in Salinas run vulnerability scans?
In our experience, a weekly scan for any system that stores patient records, credit‑card data, or other regulated info is a safe baseline. Less critical servers can be checked monthly, and purely public‑facing web pages might be scanned after every code change. The key is to align frequency with the asset’s risk tier—high‑impact assets get the most eyes, while low‑impact ones get a lighter touch. Consistency beats occasional deep dives.
Can I rely on automated scans alone, or do I need a human analyst?
Automation is great for catching the low‑ hanging fruit—missing patches, default passwords, open ports. But the real world is messy; a scanner can flag a “high‑risk” finding that’s actually mitigated by a firewall rule you already have. A human analyst adds context, validates critical alerts, and helps prioritize remediation steps so you don’t waste time chasing false positives. Think of the scanner as the first line of defense and the analyst as the seasoned guard who knows when to raise the alarm.
What should I look for in a vendor’s reporting format?
Good reports are concise, actionable, and tied to your asset inventory. Look for a clear severity rating (Critical, High, Medium, Low), a short description of the vulnerability, and a step‑by‑step remediation guide. Ideally the report links each finding to a specific host or IP address you recognize, and includes a CVE identifier so you can verify details on NVD. If the vendor offers CSV or API export, you can feed the data directly into your ticketing system for faster response.
How do vulnerability scanning services help with HIPAA or PCI compliance?
Both HIPAA and PCI require regular risk assessments and documented remediation. A vulnerability scan provides the evidence of a systematic risk review, showing auditors that you’re actively searching for known weaknesses. When the scan flags a high‑severity issue on a system that stores PHI or cardholder data, you have a clear, time‑stamped task to fix it—exactly what regulators expect. Most compliance frameworks also reference CVSS scores, which scanners generate automatically.
What are the common false‑positive triggers and how can I reduce them?
False positives often arise from services that are intentionally exposed (like a public API) or from outdated fingerprint libraries that mis‑identify a harmless banner as vulnerable. To trim the noise, fine‑tune the scan profile—disable checks for ports you know are safe, and enable “safe‑checks” mode that skips aggressive probing. Regularly update the scanner’s signatures and map findings to your known asset list; anything that doesn’t match should be flagged for manual review.
Is it worth investing in a managed scanning service versus a DIY SaaS tool?
If you have a dedicated IT admin who can schedule jobs, parse CSVs, and create tickets, a DIY SaaS platform can be cost‑effective. But many Salinas SMBs juggle staffing constraints; a managed service handles scheduling, alert routing, and report customization for you, freeing up time to focus on core business tasks. The trade‑off is price versus convenience—ask yourself whether the added peace of mind and faster remediation outweigh the extra monthly fee.
Conclusion
We’ve walked through everything from inventorying assets to automating scans, and the one thread that ties it all together is simple: vulnerability scanning services give your Salinas business the early warning you need to stay ahead of threats.
Think about the last time a surprise outage kept you up at night. Imagine if a scan had flagged that mis‑configured server days earlier – you could have patched it while sipping coffee, not scrambling during a patient appointment.
So, what’s the next step? Grab the checklist you built in Step 1, pick a scan frequency that matches each asset’s risk level, and lock it into your calendar. Set up high‑severity alerts to land straight in your ticketing system, and make sure someone owns each remediation ticket.
In our experience, the businesses that treat scanning as a regular habit—weekly for HIPAA or PCI systems, monthly for everything else—see far fewer emergency patches and pass compliance audits with confidence.
Does this feel doable for your team? If you’re still unsure which service model fits your staffing reality, a quick chat with a local expert can clear the fog and point you toward a solution that won’t break the budget.
Take a moment today to schedule that first baseline scan. The peace of mind you’ll gain is worth every minute you invest now.